Beekeeping is an ancient and rewarding practice that offers the sweet satisfaction of producing your honey while contributing to the well-being of pollinators. However, to embark on this journey, you need the right tools and equipment. In this comprehensive guide, we’ll explore the essential beekeeping equipment, hive components, ancillary tools, and protective gear that will set you on the path to successful beekeeping. Whether you’re just starting or looking to expand your apiary, this article will provide the knowledge you need to thrive as a beekeeper.
Beekeeping equipment needs can vary depending on the scale of your operation, the number of bee colonies you intend to manage, and your honey production objectives. This article will cover the essential equipment required for beginners, including hive components, protective gear, the smoker, hive tool, and equipment for honey handling.
Hive Components
The hive serves as the artificial dwelling for your honey bee colony, and it consists of several key components:
1. Hive Stand (Optional):
The hive stand is an optional piece of equipment that elevates the hive’s bottom board off the ground. This elevation helps reduce dampness within the hive, extends the lifespan of the bottom board, and keeps the hive’s entrance clear of grass and weeds. Hive stands can be constructed from various materials, including concrete blocks, bricks, pallets, logs, or a commercially produced hive stand. They can support a single colony, multiple colonies, or even a row of hives.
2. Bottom Board:
The bottom board acts as the floor of the bee colony and provides a landing platform for foraging bees. It’s essential to ensure that the hive is slightly tilted forward to prevent rainwater from entering. Many bee supply dealers offer reversible bottom boards, allowing you to choose between a 7/8-inch or 3/8-inch entrance opening in the front.
3. Hive Bodies:
The standard ten-frame hive body comes in various depths or heights, with four common options available. The full-depth hive body, measuring 9 5/8 inches high, is commonly used for brood rearing. These larger units offer sufficient space for solid brood areas with minimal interruptions. They are also suitable for honey supers (where surplus honey is stored). However, it’s important to note that when filled with honey, these full-depth hive bodies can weigh over 60 pounds, making them quite heavy to handle.
The choice of hive components will depend on your specific goals as a beekeeper. For beginners, the standard Langstroth or modern ten-frame hive is recommended due to its widespread use and availability of resources.
In the next sections of this guide, we will explore other essential beekeeping equipment, including protective gear, a smoker, a hive tool, and equipment for handling the honey crop, to help you get started on your beekeeping journey.
Hive Body Types
Beekeepers have various options when it comes to hive body types, allowing for flexibility based on their specific beekeeping goals:
- Eight-Frame Hive Bodies: Some beekeepers prefer eight-frame hive bodies. While these were traditionally homemade, they are now available from certain U.S. bee suppliers as English garden hive boxes. These boxes can be a choice for those managing smaller colonies or wishing to adopt this alternative design.
- Three- or Five-Nuc Boxes: Beekeepers involved in queen rearing or selling small starter colonies (nucs) often use three- or five-nuc boxes, typically fitted with standard deep frames. These boxes can be constructed from wood or cardboard, with the latter option being suitable for temporary use.
Management strategies can vary based on the depth of hive bodies used in the brood area. Here are some common approaches:
- Single Full-Depth Brood Chamber: This scheme involves using a single full-depth hive body, theoretically providing the queen with ample space for egg laying. However, additional room is needed for food storage and maximum brood nest expansion. Beekeepers might opt for a single full-depth brood chamber in specific situations, such as comb honey production, package installation, or when establishing nucleus colonies or divisions.
- Two Full-Depth Hive Bodies or Full-Depth and Shallow: Many beekeepers choose to use either two full-depth hive bodies or a combination of a full-depth and a shallow hive body for the brood area. Using hive bodies of similar size allows for easy interchange of combs between them.
- Three Shallow Hive Bodies: While effective, this approach is the most expensive and time-consuming as it requires three boxes and thirty frames instead of twenty. However, it offers an alternative for beekeepers who prefer to avoid the heaviness of full-depth hive bodies.
Frames and Combs
Frames and combs are fundamental components within the hive:
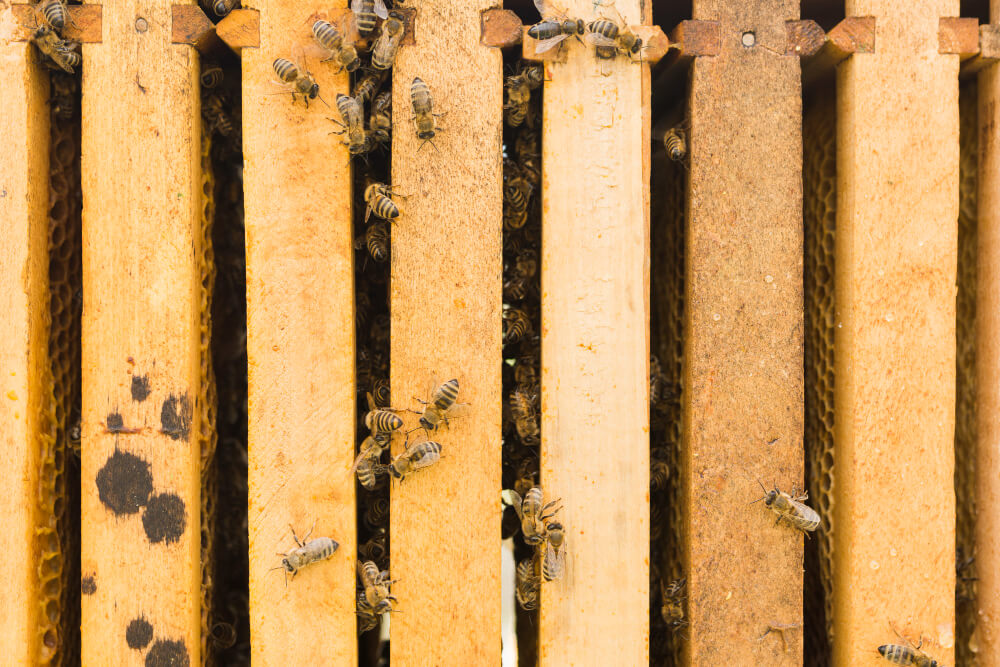
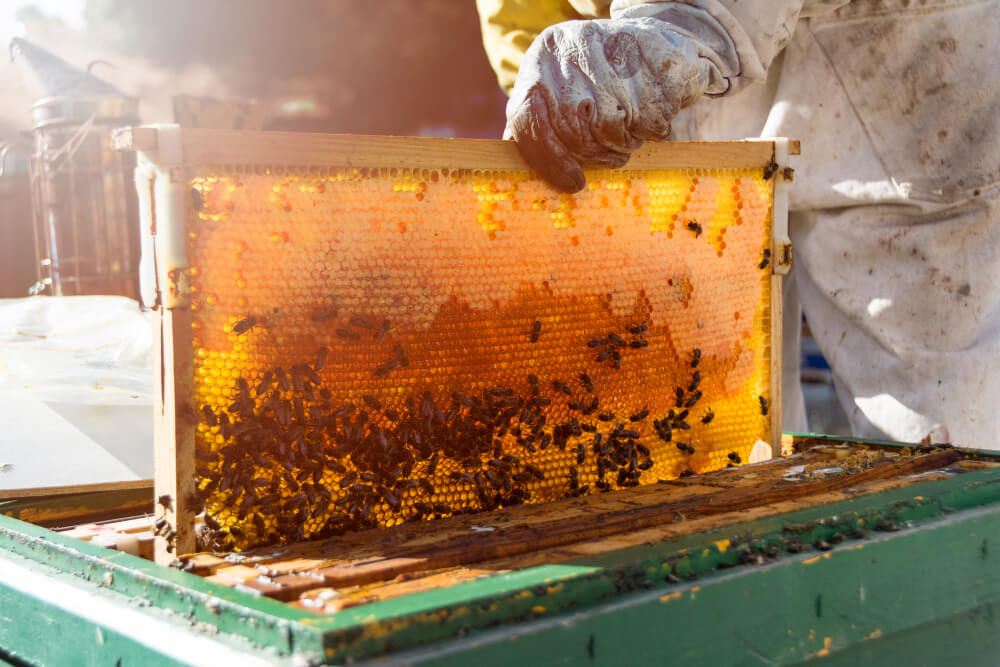
- Frame Structure: Frames are 17 5/8 inches long and come in various heights to fit different hive-body depths, including 9 1/8, 7 1/4, 6 1/4, or 5 3/8 inches. Each frame comprises a top bar, two end bars, and a bottom bar. Top bars may be grooved or wedged, while bottom bars can be split, solid, or grooved. The choice often depends on personal preference and cost considerations.
- Comb Foundation: Beeswax comb is initiated from a sheet of beeswax or plastic foundation. These foundations come in two types: thin surplus foundation for section comb honey, chunk honey, or cut-comb honey, and thicker foundation for brood chambers and frames for extracted honey production. Thicker foundations may include embedded wires or reinforcement for added strength.
- Securing Foundation: When using beeswax foundation in wooden frames, securing it within the frame with metal support pins or horizontal wires is essential. The thin wedge of the top bar holds wire hooks, ensuring that the foundation stays centered for proper drawing by the bees.
Frames with new foundation are best provided to rapidly growing colonies, such as packages, swarms, or colony splits. Offering foundation during a nectar dearth may lead to bees chewing holes in the foundation, resulting in poorly drawn combs.
The production of beeswax involves glands on the worker bee’s abdomen secreting wax scales, which are then manipulated and formed into six-sided cells, ultimately creating the comb structure.
Queen Excluder
A queen excluder is an optional piece of equipment used by less than 50 percent of beekeepers. Its primary function is to confine the queen, brood rearing, and pollen storage to the broodnest. Some beekeepers humorously refer to them as “honey excluders” because workers can sometimes be reluctant to pass through the narrow openings to store honey in the supers above until all available space in the brood chambers is used. To minimize this issue, it’s advisable to allow bees to begin storing nectar in the supers before installing the excluder. Nectar stored in drawn comb will entice the bees to pass through the excluder. Never place supers of foundation above a queen excluder.
Excluders are typically made of a thin sheet of perforated metal or plastic with openings large enough for worker bees to pass through. Other designs feature welded round-wire grills supported by wooden or metal frames.
While queen excluders have their uses, it’s essential to note that properly timed brood chamber reversal in the spring, combined with supering during a surplus nectar flow, can achieve the same purpose as a queen excluder. For this reason, beekeepers sometimes use queen excluders only with the addition of the first supers (but again, installed only after some nectar has been stored in the supers) and then remove them. This helps maintain a separation between brood combs and honey combs to prevent unnecessary darkening of honey.
Queen excluders are also employed to separate queens in a two-queen system, raise queens in queenright colonies, and for emergency swarm prevention. Additionally, they can assist in locating the queen. By placing an excluder between two hive bodies, after three days, you can determine which hive body contains the queen by identifying where eggs are present.
Inner Cover
The inner cover is placed on top of the uppermost super and beneath the outer telescoping cover. It serves several functions, including preventing bees from sealing the outer cover to the super with propolis and wax. It also creates an air space just under the outer cover, providing insulation. During summer, the inner cover shields the hive interior from direct sunlight, and in winter, it prevents moisture-laden air from contacting cold surfaces. The center hole in the inner cover can be fitted with a Porter bee escape to assist in removing bees from full honey supers.
Outer Cover
The outer telescoping cover protects hive components from weather conditions. It fits over the inner cover and the top edge of the uppermost hive body. Typically, the top is covered with a sheet of metal to prevent weathering and leakage. Removing the outer cover, while leaving the inner cover in place, minimizes disturbance to bees within the hive, making it easier to smoke the bees before manipulating the colony.
Beekeepers who frequently move hives often use a simple cover known as a migratory lid. These covers sit flush with the sides of the hive body and may or may not extend over the ends. They are lightweight, easy to remove, and allow colonies to be stacked securely a critical consideration when transporting hives.
Other Equipment and Hive Maintenance
In addition to the basic hive components, beekeepers can experiment with various pieces of equipment and hive designs. Some opt for slatted bottom boards or different English-style covers, showcasing the creative potential and individualization within beekeeping.
When it comes to maintaining your hive, ensure that all parts exposed to the weather are adequately protected with paint. Avoid painting the inside of the hive, as bees will varnish it with propolis. A light-colored exterior paint is recommended to prevent excessive heat buildup in the hive during summer. While white is a traditional choice, different color combinations can help reduce drifting of bees between colonies.
Plastic equipment is also an option, with all hive components available in plastic. Plastic frames that snap together are durable, strong, lightweight, easy to assemble, and require minimal maintenance. However, it’s worth noting that plastic hive covers, bottom boards, and hive bodies may not provide the same benefits as wooden components. Plastic doesn’t allow for easy moisture ventilation and can warp, while some types let in too much light, making foundation drawing challenging.
Ancillary Beekeeping Equipment and Protective Gear
In addition to the core hive components, several essential pieces of equipment and protective gear are crucial for safe and effective beekeeping:
Smoker:
A bee smoker is a vital tool for working with bees. It typically consists of a metal fire pot and a grate with bellows attached. The size of the smoker is a matter of personal preference, with the 4 x 7 inch size being one of the most widely used. When choosing a smoker, consider one with a heat shield around the firebox to prevent burns when supporting the smoker between your legs during hive inspections.
To generate ample cool smoke, ensure that coals are positioned above the grate, with unburned materials above the coals. Suitable fuels for the smoker include burlap, corn cobs, wood shavings, pine needles, cardboard, punk wood, bark, sumac bobs, cotton rags, dry leaves, and baling twine. An alternative to traditional fuels is liquid smoke, which can be mixed with water and sprayed onto the bees using a mister-type applicator. Under ideal conditions and when robbing is not likely, misting with sugar syrup can also work as effectively as smoke.
Hive Tool:
The hive tool is a metal bar essential for various tasks in beekeeping. It is used for prying apart frames in brood chambers or honey supers, separating hive bodies, and scraping away wax and propolis. While holsters are available for holding hive tools, many beekeepers prefer to keep the hive tool in the palm of their hand for easy access while keeping their fingers free for lifting boxes and frames. Periodic cleaning of the hive tool is necessary to remove propolis, wax, and honey. This can be done by stabbing the tool into the ground or burning it in a hot fire pot of a smoker. Both cleaning methods help prevent the spread of bee diseases. Substituting a screwdriver or putty knife for a sturdy hive tool is discouraged, as they may cause damage to frames and hive bodies.
Protective Clothing:
Wearing protective clothing is essential to safeguard yourself from bee stings. Here are key elements of protective gear:
- Bee Veil: You should wear a bee veil at all times to protect your face and neck from stings. There are three basic types of veils available: those open at the top to fit over a hat, completely hatless veils, and veils that are part of a bee suit. The most effective choice is a wire or fabric veil that stands away from the face, worn over a wide-brim, lightweight hat that fits securely. This combination offers the best protection. Veils without hats, while lightweight and easy to transport, may not fit as securely on the head, leading to the veil falling against your face and scalp as you bend over to work with bees.
- Bee Suits and Coveralls: A wide variety of coveralls and bee suits are available to beekeepers in different price ranges. The most expensive options are not always the best or easiest to use. These coveralls are useful to prevent propolis from getting on your clothing and significantly reduce the risk of stings if properly maintained and laundered regularly. Coveralls or long-sleeved shirts designed for beekeepers with attached, removable veils are popular choices.
- Clothing Color: White or tan clothing is most suitable for working with bees. Bees can react unfavorably to dark colors, fuzzy materials, and clothing made from animal fibers. Windbreakers and coveralls made from ripstop nylon fabric are excellent choices for beekeeping, although they may be too hot to wear during the summer.
- Gloves: Beginners who are concerned about being stung often opt for canvas or leather gloves. However, many experienced beekeepers find gloves cumbersome and prefer to risk a few stings for the sake of easier handling. Form-fitting gloves, such as those suitable for lab work or household chores, reduce stings and prevent sticky fingers from honey and propolis.
- Ankles and Wrists: Bees often target ankles first because they are at the level of the hive entrance when they become agitated. Secure your pant legs with string or rubber bands or tuck them inside your shoes or socks to protect your ankles. For wrists, tie open shirt sleeves with Velcro, rubber bands, or wristlets to reduce stings in these sensitive areas.
By wearing appropriate protective clothing, you can minimize the risk of bee stings and work confidently and safely with your bee colonies. Beekeeping is a rewarding hobby, and proper gear ensures a positive experience.
Conclusion
Beekeeping is a fulfilling and environmentally important pursuit, and having the right equipment and gear is crucial for your success and safety. By investing in the appropriate hive components, ancillary tools, and protective clothing, you’ll create a thriving and harmonious environment for your honeybee colonies. Remember, beekeeping is not just about producing honey; it’s about fostering these remarkable insects and contributing to the health of our ecosystems.


